 Skip to content


With so many aftermarket pistol upgrades available today, shooters have countless opportunities to make their Glock stand out from the crowd. One way to add a touch of personal style to your pistol? A Glock back plate replacement.
While Glock back plate removal and replacement is relatively simple, it can be tricky for first-time Glocksmiths. You’ll need a few tools and supplies to get the job done right, and as with any firearm maintenance task, safety and diligence are key to a successful back plate swap.
In this guide, we’re breaking down everything shooters need to know about replacing their Glock back plate—because the stock plate is just plain boring.
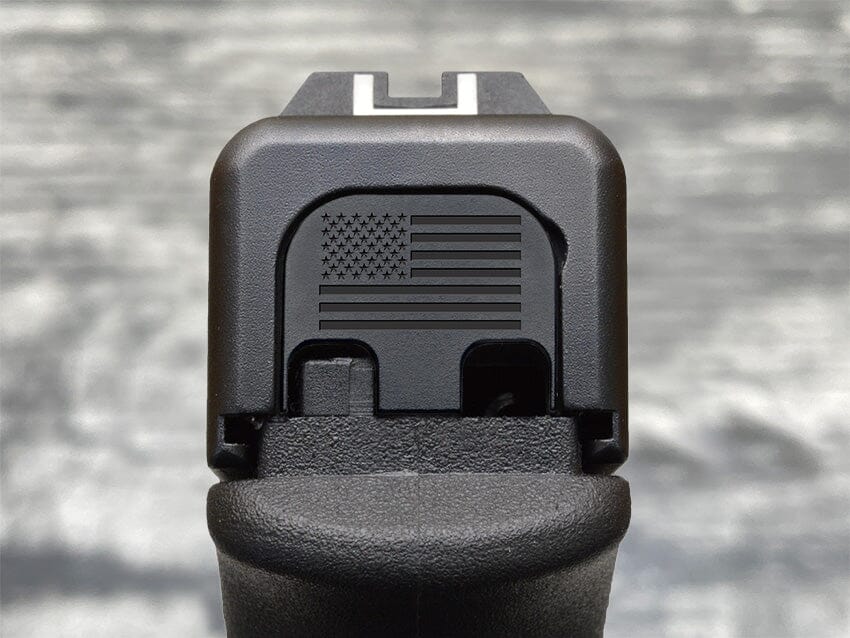
What Is a Back Plate?
First, let’s start with the basics. What’s the back plate, and why might you choose to replace it?
The back plate is a small piece on the rear of the slide. It holds a few key parts in place, namely:
- The firing pin spring
- The spacer sleeve
- The firing pin spring
While replacing your Glock back plate won’t offer any functional benefits, the back plate is an excellent place to add flair to your pistol just because. Whether you want to show off custom text or reference your favorite movie, aftermarket Glock back plates offer an opportunity to amp up your pistol’s all-important aesthetics.
Glock Back Plate Removal: A Step-by-Step Guide
With some important background out of the way, let’s dive into the Glock back plate replacement process—it’s super simple.
#1 Gather Supplies
First, gather the supplies you’ll need for your upgrade:
- Your trusty Glock (obviously)
- A small punch or screwdriver (or any small-diameter tool)
- Your new Glock back plate
- A rag, cleaner, and oil of your choice
While cleaning supplies are optional, you’ll be removing the slide from your Glock to replace the back plate; so, this is an excellent opportunity to clean out the last few weeks (hopefully not months) of range crud.
#2 Make Sure You’re Safe to Operate
As always, make sure you’re safe to operate before removing any pieces of your Glock:
- Place your ammunition away from your workspace (out of an abundance of caution)
- Remove the magazine and place it away from your workspace
- Pull back the slide and confirm that the chamber is empty
While replacing the back plate of your Glock is a simple upgrade, the process shouldn’t be taken lightly. Even though you’re not replacing a functional part, safety is still paramount.
#3 Disassemble Your Glock
After making sure you’re safe to operate, the fun begins: it’s time to disassemble your Glock.
- Remove the slide and set aside the frame.
- Use your punch or small screwdriver to find the groove on the underside of the slide with the firing pin and spacer sleeve.
- With the back plate facing up, push down on the spacer sleeve with your tool of choice while covering the entire back of the slide with your thumb. This will control the release of tension and keep you from losing springs.
- Once the pressure is alleviated, simply slide the back plate off and set it aside.
Congratulations—you’re halfway through your install.
#4 Replace The Back Plate
Grab your shiny new back plate and line it up with the grooves on the back of the slide. You’ll definitely need two hands for this step, and you can use a clamp to hold onto the slide if you need some extra dexterity.
Before you slide the new back plate into place, you’ll need to depress two key pieces of the slide:
- The firing pin spring – Push the firing pin spring down with your tool and slowly slide the back plate over it. This should get you almost halfway there.
- The extractor spring – As you did with the firing pin spring, depress the extractor spring with your tool and slide the back plate over it.
As soon as the extractor spring is safely snug against the back plate, you can slide your new piece the rest of the way in. You should hear an audible click when the back plate fully seats into place. It’s just that simple.
#5 Reassemble Your Pistol
With your new back plate successfully installed, it’s time to reassemble your pistol and admire your handiwork:
- If you take advantage of this disassembly opportunity to do some cleaning, this is the perfect time to whip out the gun oil, cotton swabs, and steel wool.
- When you’re ready to reassemble, make sure your recoil spring is still in place. You’ve been manhandling the slide, so make sure the spring is aligned properly.
- Reattach the slide to the frame.
- Before you load a magazine, rack the slide and cycle the pistol (pointed in a safe direction, of course) to make sure you’ve reassembled the pistol properly.
Discover Glock Back Plates at MILSPIN: The American Metal Company
Glock back plate removal and replacement is simple, and it’s one of the easiest ways to make your firearm your own.
If you’re looking for a one-of-a-kind Glock back plate (including custom options), look no further than MILSPIN: the metal company machining products for proud patriots. Whether you’re looking for aftermarket gun parts, EDC tools, or apparel, we have everything you need to show off your American pride.
Disclaimer
“GLOCK” is a federally registered trademark of Glock, Inc. and is one of many trademarks owned by Glock, Inc. or Glock Ges.m.b.H. Milspin.com is not affiliated with nor endorsed by Glock, Inc. or Glock Ges.m.b.H.

